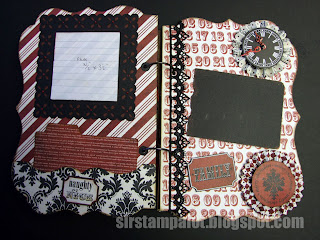
Most of of the materials she used are in the kit, the additions include black bazzill card for matting the photos and cricut cut outs to add extra festive embellishments.
Here's the front page:
 You could even use the decorations from the outside of Christmas crackers in your crafty projects too:
Once Lisa had cut all the 12x12 pages included in the kit to the same shape as the outside covers of the album from the kit, the fun job of embellishing can commence!
 Lisa loves her hidden pockets for popping in tags for journing, extra photos or just as is:
 as well as a cool hidden area!
Really love this blocked look on the left hand page. Cut up offcuts into squares and rectangles, ink the edges if you so wish and create a mosiac look:

Cool borders, pockets and rosettes:
 This rosette is easy to create, use a strip from the offcuts of cardstock, then a border punch all the way down the strip (Lisa had used the Woodware ribbon crafty edger design here), create an accordian fold all the way down the strip matching up with the ribbon slot designs. Fold the mountains and valleys, then adhere the two ends together. Fold flat and pinch together to create a rosette design. Where there's a hole in the middle, cover with something cool and coordinating.
Lisa has too much fun playing with pockets and tags!
 Lisa used 2 nesting sized circle cut outs and an eyelet along with some twine, to create her own closure on this cute envelope:
 And she's used offcuts from the cardstock to create a collaged pocket:
More cool ideas on these pages:
 Just check out the black ribbon and white buckle used here on the page edge, looking just like santa's belt buckle:
Some different ideas on this next double page:
 The ribbon included in the kit has been used to create a ribbon board, so you can slide in tags, photos, journalling, memorabilia:
 And Lisa has embossed some cardstock to use as a photo mat, and used metallic wax rubons to highlight the embossed areas:
Here's some blank pages ready to decoarte:

and then the back cover including name of the creator. The album is then held together with the book rings in the kit and offcuts of the ribbon from the kit to embellish the book rings:

Hope you all enjoyed that. Great project to adapt for any occasion.
Enjoy!
Until next time....
janicex
1 comment:
This is lovely Lisa as usual for one of your projects!! - bet this is a class that was fully booked! xx Sue
Post a Comment