Showing posts with label distress inks. Show all posts

Friday, 25 August 2017

G45 Secret Garden Mini Album


Today we have a mini album made by me (Louise) using Graphic 45 papers from the
Secret Garden collection.
The papers in this collection are beautiful and this mini album was made using just one 8x8 paper pad.
The Graphic 45 pads have what they call their 'signature' page, which is the main page depicting the whole colletion theme.  I used this signature page for the front and back of my album.
The album front and back covers are cut out of chipboard and measure approx 10cm by 16cm, the papers are cut a little larger so they cover the sides of the chipboard.


Each of the pages in the book are made from one sheet of the 8x8 paper.

I have used the We R Memory Keepers envelope punch board and made envelopes out of each piece of patterned paper.
In total I made 6 patterned envelopes using the 3 1/2" by 5 1/2" measurment which is marked Gladstone on the board itself.


I die cut 6 large tags to go in each envelope from the Tim Holtz tag collection die set.


In the 8x8 paper pad there is several pages that have lots of pieces you can cut out and use for tags and to make pockets, like I have done on the left hand side page.


The papers in this pad are so pretty and there are some little word cut out pieces you can use to decorate your pages too.


All the pieces that I have cut out, I've then used the Tim Holtz tea dye distress ink colour to ink around the edges.
I have also mat and layered these cut out pieces on ivory card so they stand out against the patterns of the base envelope and also inked those edges of the ivory mats too.


I have made lots of smaller tags too and little pockets feature throughout the album.


To finish and bind the album, I have used a cropadile punch and punched holes in all pieces so that I can put them all on two book rings to create the book. You do need to carefully align your pieces and also remove large tags from envelopes because you do not want to catch any when you punch.

When you are decorating a album like this it is worth always bearing in mind where you place decorations and try to avoid where you will be punching holes.

I have then added a selection of ribbons and lace to the tops of the tags throughout the album, great for using left over bits and bobs.

I really enjoyed making this album because it was a fun project without being too large a task.  It would be perfect made in any of the other Graphic 45 paper collections for a little gift, maybe for a new baby or a wedding keepsake.


Products used for this mini album, include: 
Scalloped Tag by Magnolia
Cropadile
WRMK Envelope Board
Tim Holtz Tag Die Collection
2mm Chipboard
2mm Chipboard
Silver Book Rings
G45 Secret Garden 8x8 pad
Tea Dye Distress Ink
Ivory Card

Thursday, 29 June 2017

Bee-cause you're special


Today we have a card by the lovely Chris Scott using a technique called "baby wipe technique".

Chris has used a baby wipe to create a stamp pad by adding drops of distress ink refills in different colours onto the wipe close together. You then take your stamp and press into the baby wipe and then stamp onto your card.
 The effect is a beautiful watercolour effect and you can add lots of different colour to one stamped image.

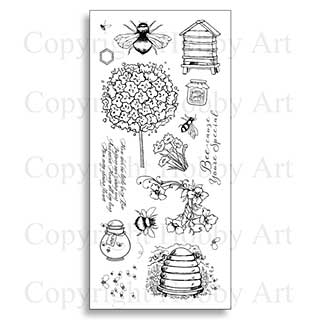
For this card Chris has used the a clear stamp set called Busy Bee by Hobby Art which has lots of designs in the set, including the sentiment Chris used.
The tiny bee's are really sweet too and Chris used glossy accents on the wings to make them stand out more.
To finish the card a few die cut wild flowers are added using the Tim Holtz Wildflowers dies set and these have been coloured using distress inks to match the card.

You can see other artwork by Chris on her blog : 'Always About Colour'.

Products used by Chris, include:


Spiced Marmalade distress ink
Scattered Straw distress ink
Peeled Paint distress ink
Wildflowers die set
Glossy Accents - Clear dimensional embelishment
Glossy Accents
Busy Bees clear stamp set

Thursday, 1 June 2017

Easter Wishes


Although Easter as been and gone for this year, I wanted to share with you couple of beautiful projects that Sara had created.  Firstly this lovely Easter card with a Sue Wilson die called Kinetics Easter Basket.
The clouds and grass are die cut from Doo Hickey dies and Sara has used tumbled glass distress ink to edge clouds as well as adding a little glitter too.

This Kinetics Easter Basket die also comes with a rabbit, bow and patterned eggs too.


I love this 3D version of the basket where Sara has turned it into an Easter table favour and added chocolate Easter eggs.  You could easily used this die to make a basket and fill with flowers for a card for anytime of the year or other gifts like a couple of nail polishes as a thank you to a friend, or sugar almonds as the classic wedding table favour. 
Sara has threaded ribbon through the handle, the design will take 3mm ribbon and not alot of it so get chance to sort through your ribbon stash and use up some left overs.


I do like the chocolate idea personally 'Yum Yum'

Products used are over both projects are:

Kinetics Easter basket by Sue Wilson
Sue Wilson kinetics window box and accessories (butterflies) 
8x8 blank cards and envelopes
Distress ink pad in tumbled glass
Magnolia Doohickey grass die
Magnolia doohickey Flag and cloud die


Wednesday, 25 May 2016

Birds and bloom collage


Today we have a card made using the Heartfelt creation stamp called
'Birds and bloom' 
I have stamped the image on watercolour card in brown ink and then embossed
with clear embossing powder.
Then using the Tim Holtz blending tool and pads I have used different distress ink pads
to create a coloured background.
I stayed away from the leaves because I wanted to paint them.
When I was happy with colour I spritz a little water on the image to add another effect.
I stamped the bird collage again and this time cut out a few details
so that I could decoupage them.
I coloured these pieces with distress markers and used silcone glue to add them.

http://www.sirstampalot.co.uk/images/0077/00770086093_L.jpg
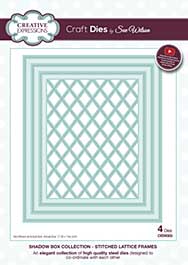
The frame is made using the Sue Wilson shadow box die
and gives a lovely stitched effect when die cut.

Products used- 
Birds and bloom collage by heartfelt creations 
Jute string - natural
Distress markers
Distress ink pads 
Wink of stella pen clear 
Detail clear embossing powder

Saturday, 10 October 2015

Snow much fun


Hello, I am back today with a card I have made using this cute penguin from Woodware.
The stamp set is called 'Chubby penguin'and it comes with three lovely sentiments too.
I have created a background by stamping snowflakes with versamark
and then used white embossing powder on them.
I used distress inks and a blending tool to add the colour to the background.
The ground is made using spellbinder die set Curved borders one and then glittered.
The penguin is coloured with copics and I have decoupaged the hat,scarf,beak and feet.
Glossy accents is used on the beak and feet and a little glitter added to the bobble and on the scarf.
Distress ink colours are -
Copic colours are - 
Beak and feet - Yr21 Yr24 Yr27
Scarf - B000 B00 B02 B12 B16 B18
penguin - C00 C1 C3 C5 C7 C9 and blender pen